Backpacking Gear: Packing Methods and Checklist
A complete backpacking checklist for every backcountry adventure including methodologies to help you pack all your hiking gear as well.

The Basics
Preparing for any trip is all about knowing your trekking plan and the conditions you are likely to face. When setting out for a new destination take the time to open the map and look at the route. Try to safely determine the challenges ahead of you as well as the length of time you expect to complete the trail in, come up with an alternate trail plan in case the conditions change, check the weather forecast, and then pack accordingly. Remember to always tell someone at home when to expect you back and leave your route details with him or her as an emergency precaution. That way, if something does happen in the backcountry rescuers will know where to find you.

Methodologies
When it comes to what to pack and how to pack it there are many different theories and styles. Clearly, the lighter your pack the easier it is to carry and will result in an increased mileage with decreased effort. Broken down into categories the basic methods are light versus ultra light. However, there is always that one person who packs everything but the kitchen sink and would be considered “heavy” in my mind. Try not to be this person.
When it comes to light versus ultra light it is all about the weight difference. In ultra light packing your goal is to maintain a weighted pack of approximately 20 to 25 pounds or less– no matter the duration of your trip. Of course, water and food can affect this weight drastically. Therefore, people may opt for a bivy or shelter instead of a tent to scrape off a pound, but most of these changes will come at the price of comfort. My personal philosophy, use ultra light equipment as possible (especially for items like stoves, which can otherwise become heavy), but do not become so obsessed that you scrape off weight at the expense of safety or comfort towards weather (i.e.: always pack enough clothing and proper shelter for the terrain and forecast you are entering; these items can provide a lifeline in emergency situations). It is possible to get your pack down to 25 pounds without being completely ultra light.
If you do not already own gear, it will be easier for you to start off buying ultralight gear. However, if you already own items, take your time switching over and be sure to not make your first purchase an ultralight backpack. Until your weight comes close to 25 pounds, most ultra light packs will not be built to support the weight. Of course, always check the specs on any piece of equipment you buy as there is not a hard and fast rule.
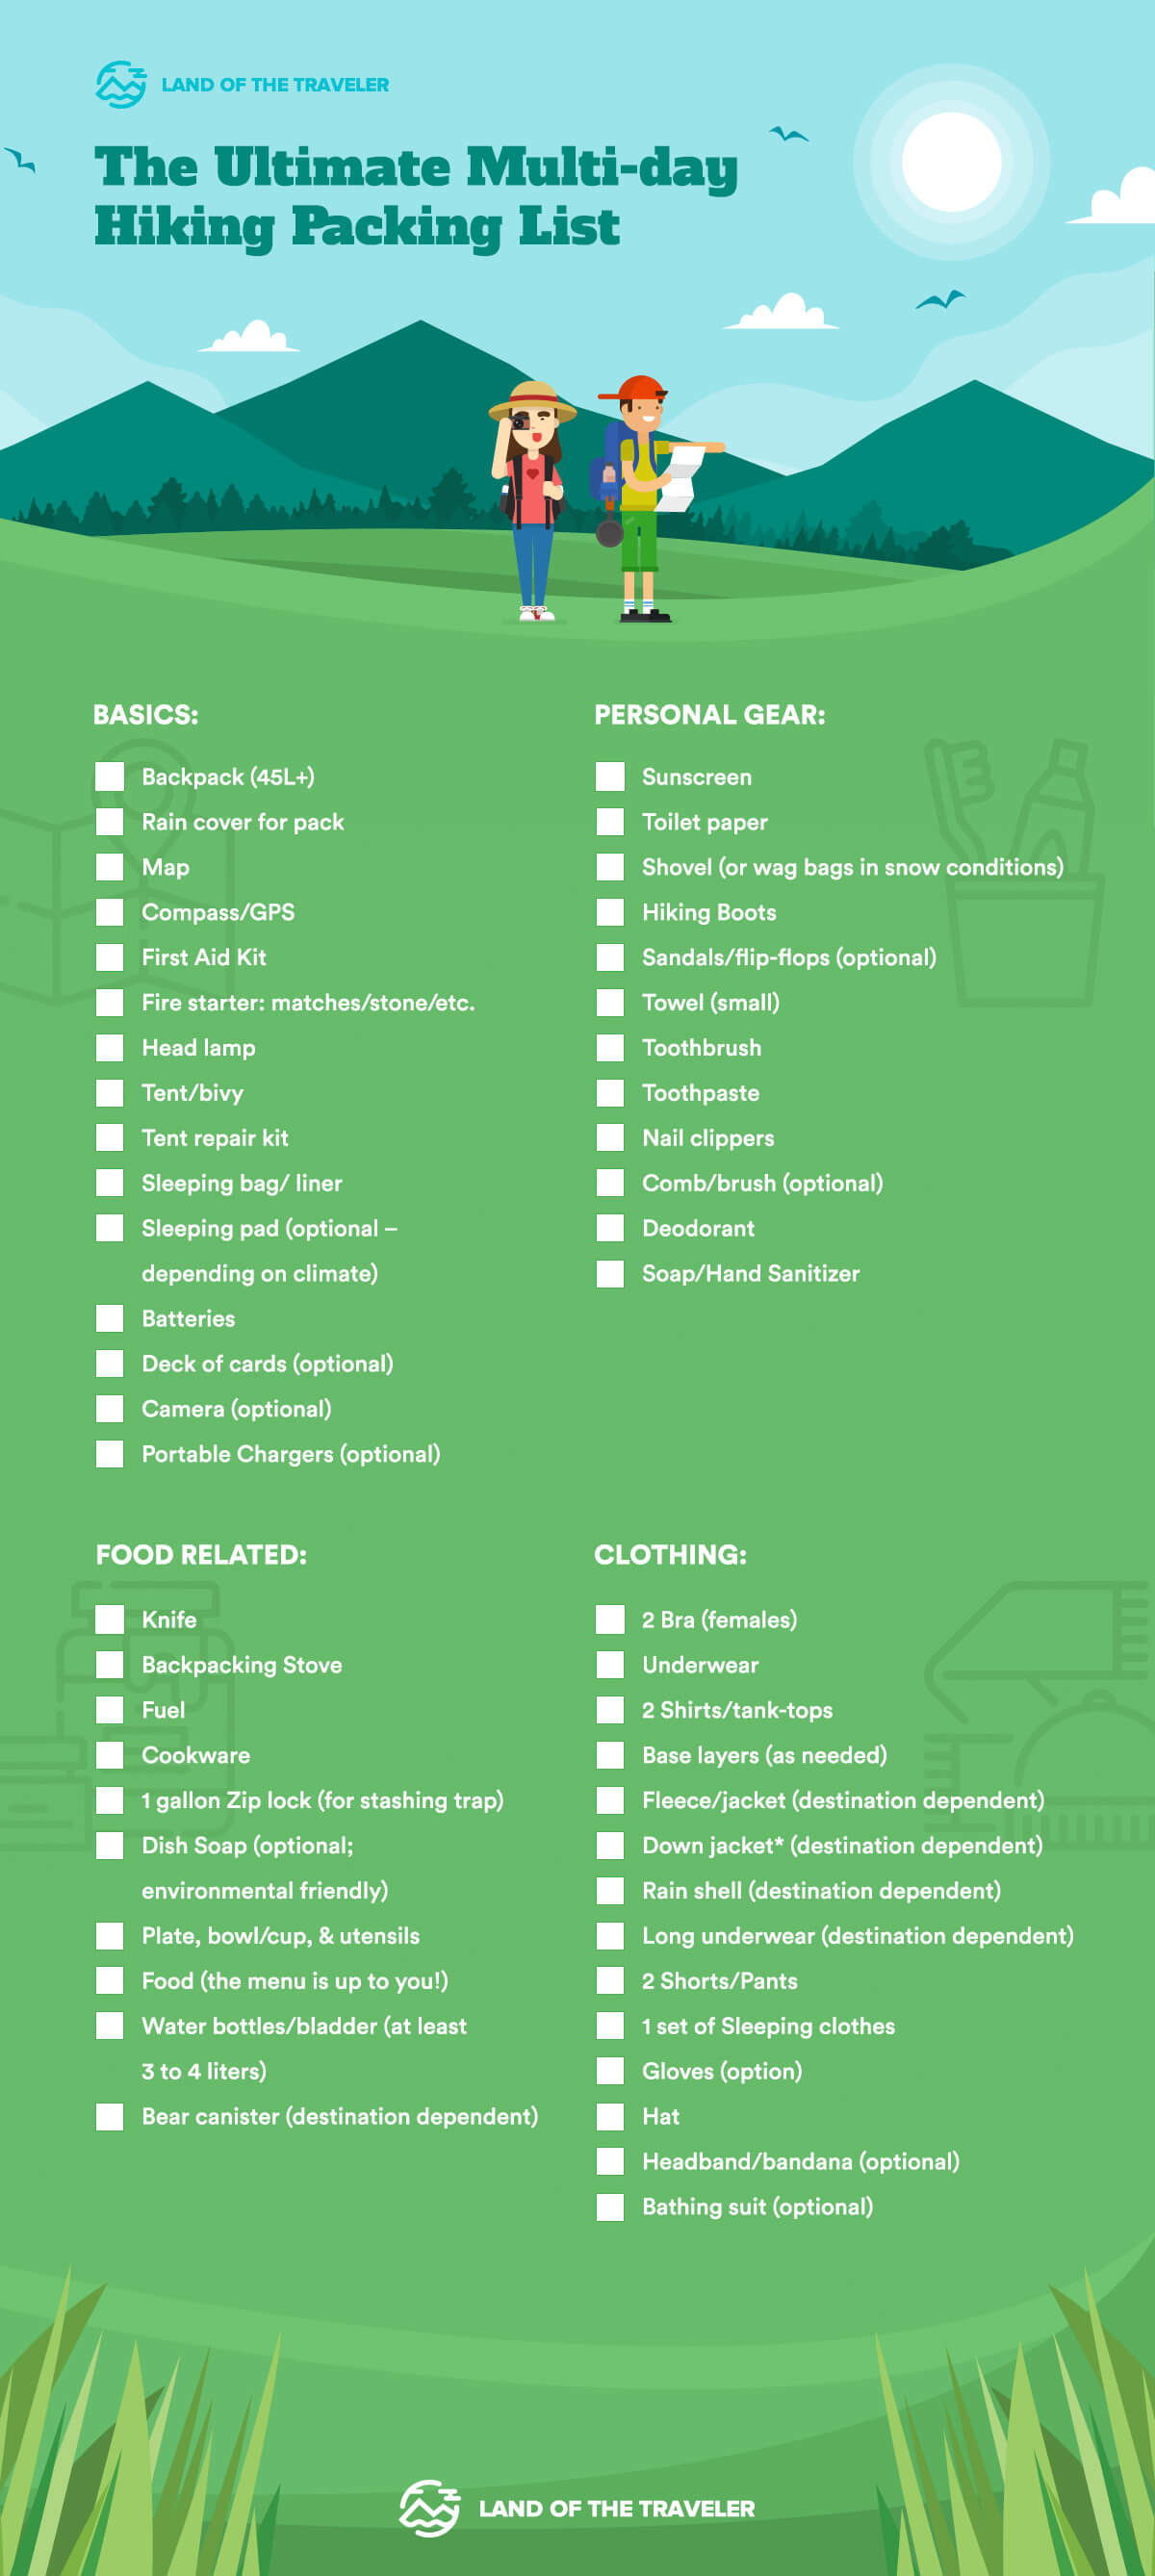
General Backpacking Checklist
- Backpack (45L+)
- Rain cover for pack
- Map
- Compass/GPS: Make sure you know how to use your equipment. Your map and compass, along with a possible GPS device are your lifelines. They are pieces of gear that make sure you get from point a to point b and should be used with care. If you do pack a GPS, you should still have a backup map and compass for when batteries go out or you hit a technological glitch. Additionally, consider conditions when buying a GPS. While many models now come with touch screens, remember that these features can be harder to use with gloves on or in the rain. Sometimes, good old-fashioned buttons are simpler. Do your research before deciding what is right for you.
- First Aid Kit
- Firestarter: matches/stone/etc.
- Headlamp
- Tent/bivy: What type of shelter you sleep in depends on what weight you would like to carry, the temperatures you will be sleeping in, and how many people are joining you. Clearly, if you are traveling in a group of 2+ it is easier to split up weight and taking a tent becomes a more solid option. While many solo travelers will opt for a bivy instead of a single tent. This is all a personal preference.
- Tent repair kit
- Sleeping bag: Always use an appropriately rated sleeping bag or at least a warmer than necessary one. It is easier to unzip and cool off in the summer but never head into winter conditions with less than a 25 to 0° F bag. When necessary, use liners to increase temperature durability.
- Sleeping bag liner – Sometimes these alone can prove sufficient depending upon the situation.
- Sleeping pad (optional – depending on climate): During warm conditions sleeping pads can be optional, and while they provide comfort some people will do without. If you buy an inflatable pad you will find that they pack away small and are incredibly light to carry, and can be found to decrease considerably in size and weight at each increasing price point. However, if you are headed into snow conditions you will want the basic, old-style foam mattress pad. This is due to the fact that the thinner air pads tend to absorb the temperature of the ground. To truly protect yourself from the chill and stay comfortable use a foam pad with your air mat on top.
- Water purification filter/tablets
- Batteries
- Deck of cards (optional)
- Camera (optional)
- Portable Chargers or Travel Adapters (optional) (duration dependant)
Personal Gear
- Sunscreen
- Toilet paper
- Shovel (or wag bags in snow conditions)
- Clothing : This is one of the easiest places to over pack. When it comes to clothing keep the weather in mind and never under pack for the conditions. However, backpacking will make you smelly and by the time you hit civilization you will need a good, long shower. Just embrace this! And therefore, wear your one set of clothing and bring 1 additional set for basics like pants and t-shirts. If you really must, try to keep your shirt count limited to 2-3, anything more just becomes weight. The two items you might want to pack slightly more of is underwear and socks. The extra underwear provides a clean environment for your groin that will decrease the risk of fungal and yeast infections, along with UTIs. As for socks, change as needed and never hike in wet socks or you will end up with terrible blisters. Underwear and socks should be washed when possible during long treks and left to dry tied to your pack while you hike in the sun. You can also wash and dry spare sets of clothing.
- 2 Bra (females)
- Underwear
- 2 Shirts/tank-tops
- Baselayers (as needed)
- Fleece/jacket (destination dependant)
- Down jacket (destination dependant):
- When it comes to down versus synthetic clothing these are the basic consideration: Down packs down into a smaller size for the same weight but cannot keep you dry when wet, while synthetic jackets can keep you warm when dry or wet but tend to be bulkier.
- Rain shell (destination dependant)
- Long underwear (destination dependant)
- 2 Shorts/Pants
- 1 set of Sleeping clothes (Do not use the same thing you wore during the day!)
- 3+ Socks
- Gloves (option)
- Hat
- Headband/bandana (optional)
- Bathing suit (optional)
- Boots (Make sure they fit well and are broken in!)
- Sandals/flip-flops (optional)
- Towel (small)
- Toothbrush & the usual toiletries
- Toothpaste
- Nail clippers (keep in first aid kit)
- Comb/brush (optional)
- Deodorant
- Soap/Hand Sanitizer
Food Related
- Knife
- 1-gallon Ziplock (for stashing trap)
- Backpacking Stove (Recommendations: JetBoil or MSR WindBurner or Alpinist)
- Fuel
- Cookware
- Dish Soap (optional; environmental friendly)
- Plate, bowl/cup, & utensils
- Food (the menu is up to you!)
- Water bottles/bladder (at least 3 to 4 liters)
- Bear canister (destination dependent)

Trekking into the backcountry is one of the most amazing experiences you will have. From forest filled with towering redwoods to extreme alpine environments, nature will never stop surprising you. Just remember, that being far from civilization means being far from help. Commonly, you will even find yourself without cell service. Therefore, make sure you have all the essentials from your backpacking checklist and always stay within your comfort zone. That way, you can truly enjoy your trip!
Download & Print our checklist here:
Simply right click & save!
