Backpacking First Aid Kit & Medical Checklist
Seeking a complete backpacking first aid kit checklist? Read our medical supply lists & tips to aid you on everything from day hikes to alpine environments.
Basic First Aid Kit
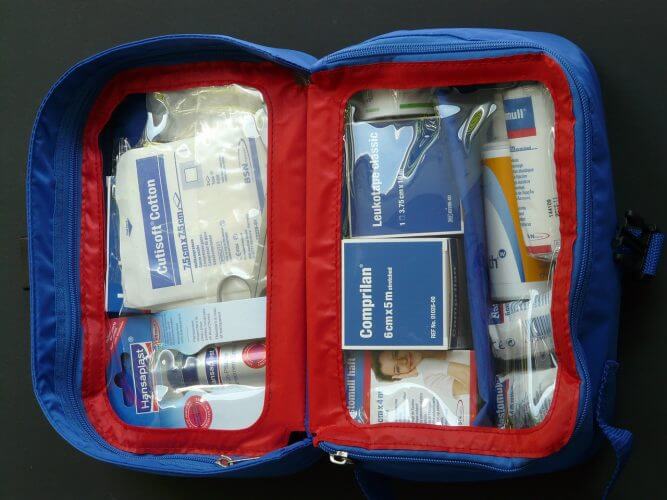
From scratches to breaks, medical kits are a survival necessity when in the backcountry. However, they are of little use if you do not understand what to use or how to use it during a time of need. This checklist will help you put together appropriate kits for varied situations, while also providing the use of each item. However, I would also recommend looking at taking a Basic First Aid or Wilderness First Aid class to gain more experience and skills if you will be heading into the wilderness on a regular basis.

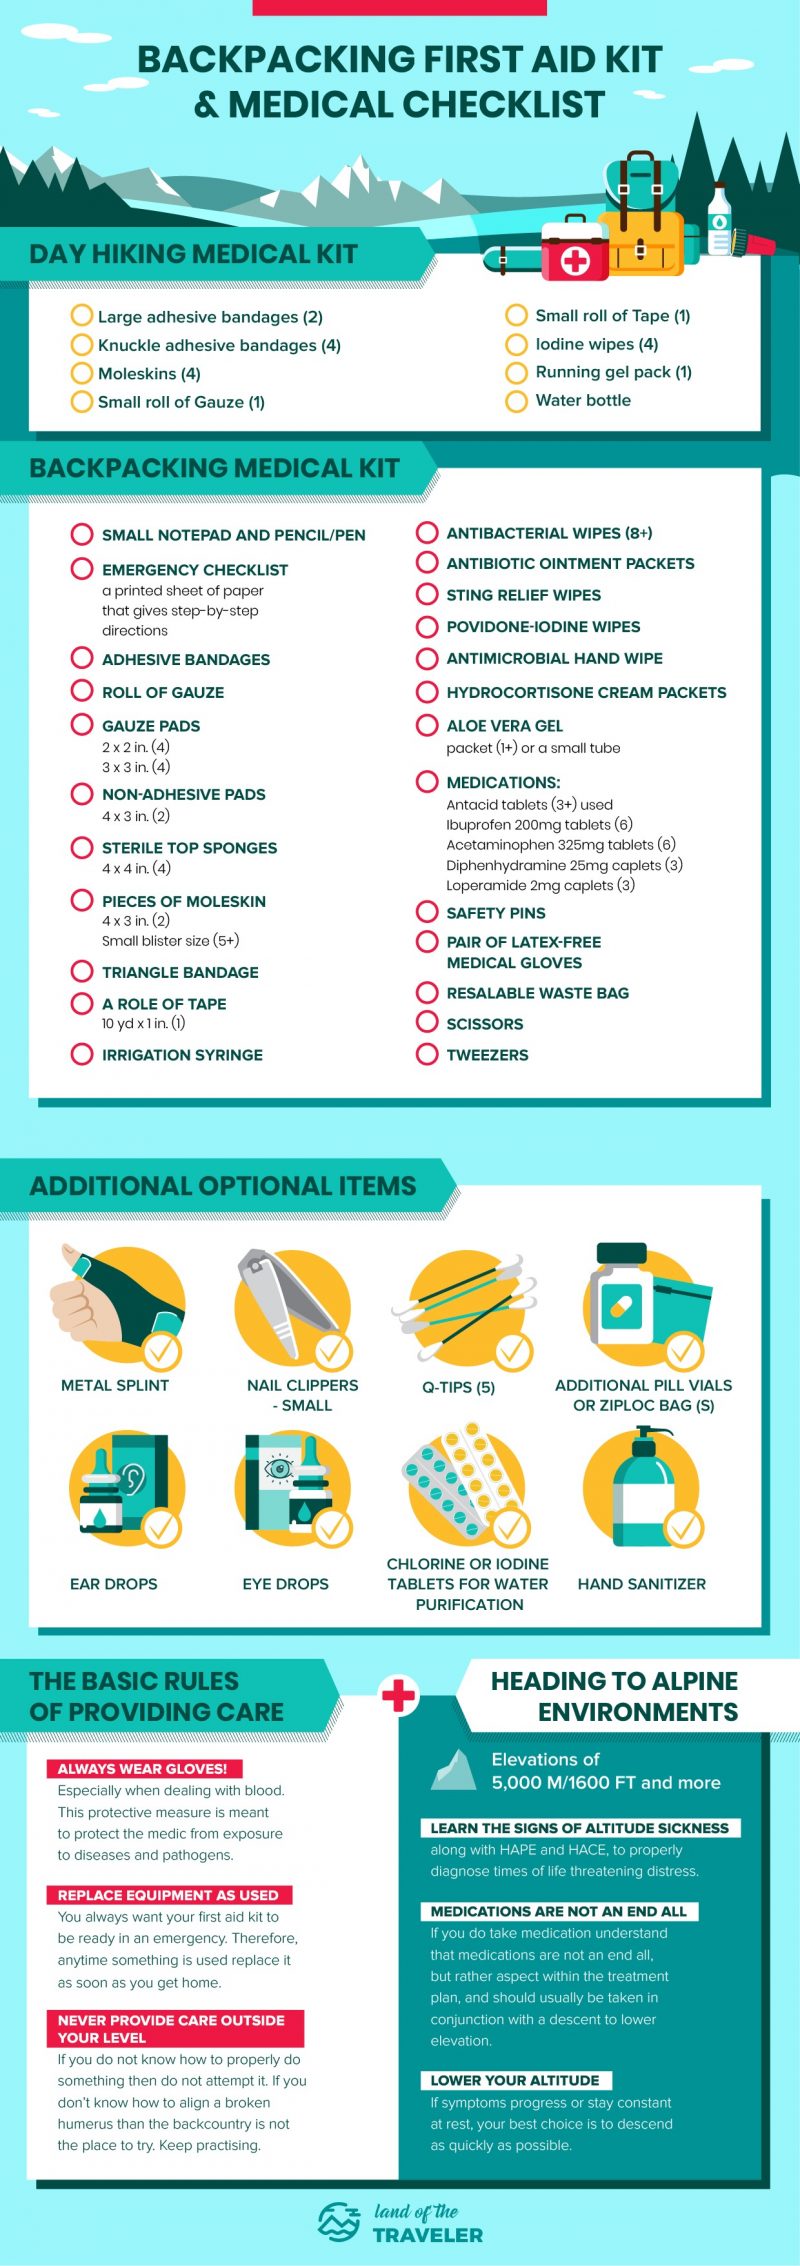
Day Hiking Medical Kit
In addition to all your essential backpacking items you definitely need to bring along a first aid kit. It is easy to think that when you are going on a short hike it is unnecessary to bring along a medical kit. After all, the car is usually only ten miles away at most. Right? Wrong! During any medical situation, what started out as a simple, achievable route will turn into a struggle. Something as simple as blisters can cause a person excruciating pain and slow down the pace to a near crawl. Not to mention trying to help your dehydrated friend slug along until you can get water back at the car.
For a Day Hike Med Kit you do not need a lot, but you do need the basics in this small, palm-sized medical kit.
- Large adhesive bandages (2)
Good for covering a large cut.
- Knuckle adhesive bandages (4)
Also good for abrasions of the hands or fingers.
- Moleskins (4): for blisters.
- Small roll of Gauze (1)
Wrapping any other wounds, especially along limbs.
- Small roll of Tape (1)
For pasting down gauze or reinforcing other bandages, also can be used with a stick to create a split, or even to repair a tear in a backpack or clothing.
- Iodine wipes (4)
To clean any wound.
- Running gel pack (1)
Great source for emergency glucose and/or dehydration, best taken with water.
- Water bottle
At least ½ L per person, but increase depending on mileage and temperature.
Backpacking Medical Kit
Having a good basic medical kit when heading out into the backcountry is a necessity. This checklist will provide the basic foundation for a good kit but should be modified as necessary depending on the medical history of people in the group, along with conditions and possible environmental exposures.
Small notepad and pencil/pen: for jotting down notes during an emergency to keep track of the patient’s medical condition. Always take notes! No one is going to remember the pulse in ten minutes and be able to tell you accurately if the patient is steady or declining.
Emergency checklist: a printed sheet of paper that gives step-by-step directions.
Adhesive bandages
For covering scrapes, cuts, blisters, bites, or any other flesh wounds.
- 3 x 0.75 in. (3)
- 3 x 1 in. (4)
- Knuckle (5+)
- Butterfly closures (3)
Used exclusively for a very thin but deep cut. These bandages pull the two sides of the cut into alignment so that the skin can knit back together.
Roll of gauze (1)
Wrapping any other wounds, especially along limbs.
Gauze pads
Perfect for applying pressure to any bleeding wound.
- 2 x 2 in. (4)
- 3 x 3 in. (4)
Non-adhesive pads
For applying pressure to wounds when you will need to keep replacing the pad in use.
- 4 x 3 in. (2)
Sterile top sponges
Perfect for applying pressure to a wound that continues to bleed.
- 4 x 4 in. (4)
Pieces of moleskin
For covering blisters or worn skin, perfect for heels. You might want to use tape to keep moleskin bandage in place.
- 4 x 3 in. (2)
- Small blister size (5+)
Triangle bandage (2)
Your go-to tool for creating anything from a sling for a broken arm, tourniquet for a severed femoral artery, or a tie down method for a splint.
A role of tape: 10 yd x 1 in. (1)
For pasting down gauze or reinforcing other bandages, also can be used with a stick to create a split, or even to repair a tear in a backpack or clothing.
Irrigation syringe
For cleaning and flushing out dirty and/or deep wounds (only use with clean, purified water).
Antibacterial wipes (8+)
For cleaning wounds.
Antibiotic ointment packets (6)
For putting on wounds before dressing with a bandage.
Sting relief wipes (3+)
For insect bite relief.
Povidone-iodine wipes (6)
For cleaning wounds in an easy and manageable manner.
Antimicrobial hand wipe (1)
For keeping yourself clean after treating a patient.
Hydrocortisone cream packets (2)
Aloe vera gel packet (1+) or a small tube
For relieving the itch and nourishing sunburnt skin.
Medications:
- Antacid tablets (3+) used
May be used to treat: heartburn, indigestion, and diarrhea. - Ibuprofen 200mg tablets (6)
May be used to treat: inflammation, pain, fever, and gout. - Acetaminophen 325mg tablets (6)
May be used to treat: pain, fever, and sinus infection. - Diphenhydramine 25mg caplets (3)
May be used to treat: allergic reactions (e.g., hives) and motion sickness/nausea. - Loperamide 2mg caplets (3)
May be used to treat: diarrhea and symptoms of irritable bowel syndrome.
Safety pins (4+)
For general use with triangle bandages, posting notes on a patient’s chest, or keeping clothing away from a wound.
Pair of latex-free medical gloves (1)
For you to wear for your own protection against blood borne pathogens and infections when giving any medical treatment to a patient.
Resalable waste bag (1)
For collecting your scraps and trash.
Scissors
For cutting away clothing as necessary, trimming down gauze pads, or cutting tape from the roll.
Tweezers
For removing small splinters or ticks.
Additional Optional Items
- Metal splint (can use a small branch or natural splint as a substitute)
For holding a broken arm or leg in place. - Nail clippers – small
For trimming down nails when broken or irritated. - Q-tips (5)
For cleaning wounds. - Additional pill vials or Ziploc bag(s)
For spare trash. - Ear drops
For ear aches or infections. - Eye drops
To flush out the eye. - Chlorine or iodine tablets for water purification
For emergency use to create clean water. - Hand sanitizer: This does not need to be packed away in your first aid kit, but should be in an easy to grab spot, accessible throughout the day.
To keep clean throughout your trip, and lower the chance of infection and spread of communicable diseases.
Heading to Alpine Environments (elevations of 5,000 m/1600 ft and more)

Altitude medication: such as Diazepam. For this, you will need to ask your MD for a prescription.
- Learn the signs of altitude sickness, along with HAPE and HACE, to properly diagnose times of life threatening distress. If you do take medication understand that medications are not an end all, but rather 1 aspect within the treatment plan, And should usually be taken in conjunction with a descent to lower elevation. When hiking at high elevations, remember to drink plenty of water and give your body time to acclimate. It is usually recommended to keep your elevation gain at 500 meters or less per a day, with acclimating/rest days as needed. If symptoms progress or stay constant at rest, your best choice is to descend (lower your altitude) as quickly as possible.
Generic prescription antibiotics for a range of infections.
Females, when you are backpacking for many days and your hygiene becomes lacking, the most common related conditions are yeast and/or UTI infection. When possible, ask your physician to prescribe you backup medication to bring with you for a “just in case” scenario.
The Basic Rules of Providing Care
- Always wear gloves! Especially when dealing with blood.
This protective measure is meant to protect the medic from exposure to diseases and pathogens. - Replace equipment as used.
You always want your first aid kit to be ready in an emergency. Therefore, anytime something is used replace it as soon as you get home. Also, make sure to clean or replace instruments as needed. - Never provide care outside your level.
If you do not know how to properly do something then do not attempt it. If you don’t know how to align a broken humerus than the backcountry is not the place to try. Instead, tie your friends are to a branch, creating a splint that will keep the bones from moving around and as straight as possible, create an evacuation plan, and get him or her to a hospital as fast as possible. - Keep practising.
The best way to be prepared is to take medical classes that teach you vital and life-saving skills. There are many international institutions that offer wilderness specific medical classes for the layperson, which is a great place to start!
Additional Tips & Info
- It is best to carry only over the counter medicines. Additionally, never give a patient any medications they could be possibly allergic to. And note that the medications listed here are general recommendations and not a medical advice on how to treat.
- Always have an emergency set of iodine or chlorine tablets for water, and keep these separate from your day-to-day trail tablets. That way, if you are down to your emergency supply you actually realize it before being completely out of water.
- Tape: There are many forms of tape that you can buy at any generic pharmacy. However, outdoor stores will generally carry climbing tape, a strong take that climbers use to protect their hands when crack climbing. I would strongly recommend using this as your medical tape since it is extremely strong, stands up against wear and tear, and more water resistant than the normal medical tape.
- Gauze: Like medical tape, there are many forms of gauze. Gauze is meant to be breathable and should not have too close of a knit, but the most helpful feature will be “self-adhering” or “sticky” gauze, which will stick to itself when torn and therefore not require tape to stay in place.
- All medical equipment is one-time use only, with the minor exception of: scissors, nail cutters, and tweezers. However, if any of these instruments should touch blood they will need to be properly sterilized or replaced for safe measure.
Download our First Aid & Medical Checklist for Backpackers here:
You can right click & save!
